2. Creation of Corporate Customer
2.1 Introduction
The process begins when a prospect/customer approaches the bank (via phone / net banking or by walking into the branch) with an account opening request or when the bank initiates the process by approaching a prospect-lead from its database. In case of a bank-initiated request, the process continues only if the prospect is interested. The process continues with the receipt of the required set of documents by the bank from the customer for savings account opening, which is followed by New Customer Due Diligence (NCDD) check. If the NCDD check is not passed for a customer, the application is rejected. For a customer who passes the NCDD check, the customer account is opened in Oracle FLEXCUBE and the kit is dispatched.
This chapter contains the following section:
2.2 Stages in Customer Creation
In Oracle FLEXCUBE, the process for creating a corporate customer is governed by several user roles created to perform different tasks. At every stage, the users (with requisite rights) need to fetch the relevant transactions from their task lists and act upon them. Appropriate web services will be called in at certain stages to complete the transaction.
This section contains the following topics:
- Section 2.2.1, "Input Customer Details"
- Section 2.2.2, "Identify Customer Requirements"
- Section 2.2.3, "Capture Details For IPCA Checks"
- Section 2.2.4, "Capture Details for NCDD Checks"
- Section 2.2.5, "Check Prospect for Credit History"
- Section 2.2.6, "Retrieve Prospects Credit Report and Analyse"
- Section 2.2.7, "Balance Sheet Analysis"
- Section 2.2.8, "Prepare Note for InPrinciple Approval"
- Section 2.2.9, "IPCA Decision"
- Section 2.2.10, "Prospect Fit to Be a Customer"
- Section 2.2.11, "Negotiation"
- Section 2.2.12, "Obtain Customer Relationship Form"
- Section 2.2.13, "Input Details For Customer Creation"
- Section 2.2.14, "Verify Details For Customer Creation"
2.2.1 Input Customer Details
Users belonging to the user role CORMROLE (Corporate Relationship Manager) can perform this activity.
If you have the required access rights, you can enter details for a new customer in the ‘Input Details’ screen. To invoke this screen, type ‘STDCC050’ in the field at the top right corner of the Application tool bar and clicking the adjoining arrow button.
The screen appears as shown below:
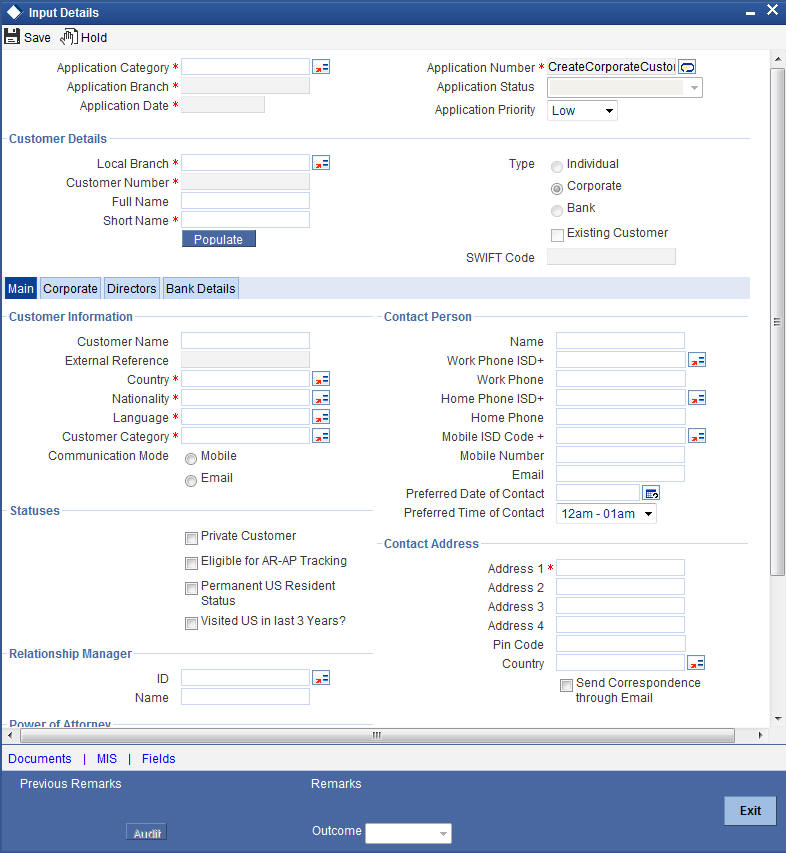
You can capture the following details
Application Category
Specify the application category. You can select the appropriate category from the adjoining option list.
Application Branch
The system displays the branch code.
Application Date
The system displays the date of the application.
Application Number
The system displays the application number.
Application Status
The system displays the status of the application.
Application Priority
The system displays the priority of the customer.
Customer Details
Local Branch
Specify the applicant’s home or local branch code.
Oracle FLEXCUBE supports multi branch feature. After input details, verify details and modify details stages, the system creates the record of the applicant in the local branch.
Customer Number
On clicking ‘Populate’ button, the system displays the customer number.
Full Name
Enter full name for the customer
Short Name
Enter a short name for the customer.
Type
Specify the customer type.The following options are available for selection:
- Individual
- Corporate
- Bank
SWIFT Code
The system displays the SWIFT code on clicking ‘Populate’ button.
Existing Customer
Check this box, if the customer is an existing customer.
2.2.1.1 Main tab
Customer Information
Customer Name
Specify the name of the customer.
External Reference
The system generates a unique identifier for the customer and displays it here.
Country
Specify the country in which the customer resides.
Nationality
Specify the nationality of the customer. You can also select the nationality of the customer from the option list. The option list displays all valid country codes maintained in the system.
Language
As part of maintaining customer accounts and transacting on behalf of your customer, you will need to send periodic updates to your customers in the form of advices, statement of accounts and so on.
Indicate the language in which your customer wants the statements and advices to be generated.
Customer Category
The system displays the value as ‘Corporate’.
Communication Mode
Select the mode of communication you prefer. The following options are available for selection:
- Mobile
Contact Person
Name
Specify the name of the contact person.
Work Phone ISD+
Specify a valid international dialling code for the work telephone number of the customer. The adjoining option list displays valid ISD codes maintained in the system. Select the appropriate one.
Telephone
Specify the telephone number of the contact person.
Home Phone ISD+
Specify a valid international dialling code for the home telephone number of the customer. The adjoining option list displays valid ISD codes maintained in the system. Select the appropriate one.
Home Phone
Specify the home telephone number of the customer.
Mobile ISD Code+
Specify the international dialling code for the mobile number of the customer. The adjoining option list displays valid ISD codes maintained in the system. Select the appropriate one.
Mobile Number
Specify the mobile number of the customer.
Specify the E-mail ID of the contact person.
Preferred Date of Contact
Specify the preferred date for contacting the customer. You can also select the date from the adjoining calendar icon.
Preferred Time of Contact
Select the preferred time for contacting the customer on the preferred date of contact, from the adjoining drop-down list. This list displays the following time slots in 24hrs format:
- Any time
- 1 hour combination of timings starting from 12am – 1am to 11pm – 12am.
Contact Address
Address 1 – 4
Specify the contact address here.
Pincode
Specify the pin code.
Country
Select the country from the adjoining option list.
Send Correspondence through Email
Check this box if you need to send the correspondence through mail.
Statuses
Private Customer
Check this box if you are a private customer.
Eligible for AR-AP Tracking
Check this box to enable Account Receivable and Account Payable processes for the customer.
Permanent US Resident Status
Check this box to indicate that the corresponding director is a permanent US resident.
Visited US in last 3 years?
Check this box to indicate that the beneficial owner has visited US in the last three years.
Relationship Manager
ID
Specify the ID of relationship manager. The adjoining option list displays a list of valid IDs maintained in the system. Select the appropriate one.
Name
Specify the name of the relationship manager.
Power of Attorney
Note
If FATCA is enabled at the bank and the check box 'Power of Attorney' is checked here, then it is mandatory to specify the Power of Attorney information.
Power of Attorney
Check this box to indicate that the customer account is to be operated by the power of attorney holder.
Holder Name
The person who has been given the power of attorney.
Address
Specify the address of the power of attorney holder.
Country
Specify the country of the power of attorney holder.
Nationality
Specify the nationality of the power of attorney holder.
Telephone ISD Code +
Specify the international dialling code for the telephone number of the power of attorney holder. The adjoining option list displays valid ISD codes maintained in the system. Select the appropriate one.
Telephone Number
Specify the telephone number of the power of attorney holder.
2.2.1.2 Corporate Tab
Click ‘Corporate’ tab to maintain corporate details.

You can maintain corporate details here:
Registration Details
You can specify the registration details here:
Name
Specify the registration name of the organization.
National ID
Specify the national ID of the organization.
Address 1-4
Specify the registration address of the organization.
Pin code
Specify the pin code of the registration address of the organization.
Country
Specify the country code of the registration address of the organization. The adjoining option list displays all valid country codes. select the appropriate one.
Incorporation
You can maintain the incorporation details here:
Date
Specify the date of incorporation from the adjoining Calendar icon.
Capital
Specify the capital amount of incorporation.
Net Worth
Specify the net worth of the organization.
Currency of Amounts
Specify the currency code of the amounts. The adjoining option list displays all valid currency codes. select the appropriate one.
Country
Specify the country code of incorporation. The adjoining option list displays all valid country codes. Select the appropriate one.
Additional Details
Maintain the additional details here:
Type of Ownership
Specify a valid type of ownership of the customer for the specified organization.
Description of Business
Provide description for the business, if any.
2.2.1.3 Directors Tab
Click ‘Directors’ tab to maintain directors details.

You can maintain the director details here:
Director Details
Director Name
Specify the name of the director.
Tax ID
Specify the tax ID of the director
Work Phone ISD+
Specify a valid international dialling code for the work telephone number of the director. The adjoining option list displays valid ISD codes maintained in the system. Select the appropriate one.
Work Phone
Specify the work telephone number of the director.
Home Phone ISD+
Specify a valid international dialling code for the home telephone number of the director. The adjoining option list displays valid ISD codes maintained in the system. Select the appropriate one.
Home Phone
Specify the home telephone number of the director.
Mobile Phone ISD+
Specify a valid international dialling code for the mobile number of the director. The adjoining option list displays valid ISD codes maintained in the system. Select the appropriate one.
Mobile Number
Specify the mobile number of the director.
Specify the E-mail of the director
Address For Correspondence
Address 1-4
Specify the address of correspondence of the director.
Pin Code
Specify the pin code of correspondence of the director.
Country
Specify the country code of the correspondence address. The adjoining option list displays all valid country codes. Select the appropriate one.
Permanent Address
Address 1-4
Specify the permanent address of the director.
Pin Code
Specify the pin code of the specified permanent address.
Country
Specify the country code of the specified permanent address. The adjoining option list displays all valid country codes. Select the appropriate one.
Other Details
Nationality
Specify the nationality of the director.
Permanent US Resident Status
Check this box if the director is a permanent resident od US.
Share Percentage
Specify the percentage of shares the director holds.
2.2.1.4 Bank Details Tab
To maintain the bank details, click ‘Bank Details’ tab. The following screen is displayed:

You can specify the existing bank account details here.
Bank Code
Specify the existing bank code.
Branch Code
Specify the existing branch code.
Account Type
Specify the account type from the adjoining drop-down list. Available options are:
- Nostro
- Misc Dr
- Misc Cr
- Savings Current
- Deposit
- Line
Account Number
Specify the existing account number
Visit Frequency
Specify how frequently the customer visits the bank.
You can edit the fields under miscellaneous support during the following stages:
- Input Details
- Requirement Check
- IPCA Check
- NCDD Check
- Customer Details
Select the action ‘PROCEED’ in the textbox adjoining the ‘Audit’ button in this screen and save the record by clicking the save icon in the tool bar. The system displays the information message as "ST-ACQR-001 Acquire Successful"
The system creates a task ‘Identify Customer requirements’ in the ‘Assigned’ task list.
2.2.2 Identify Customer Requirements
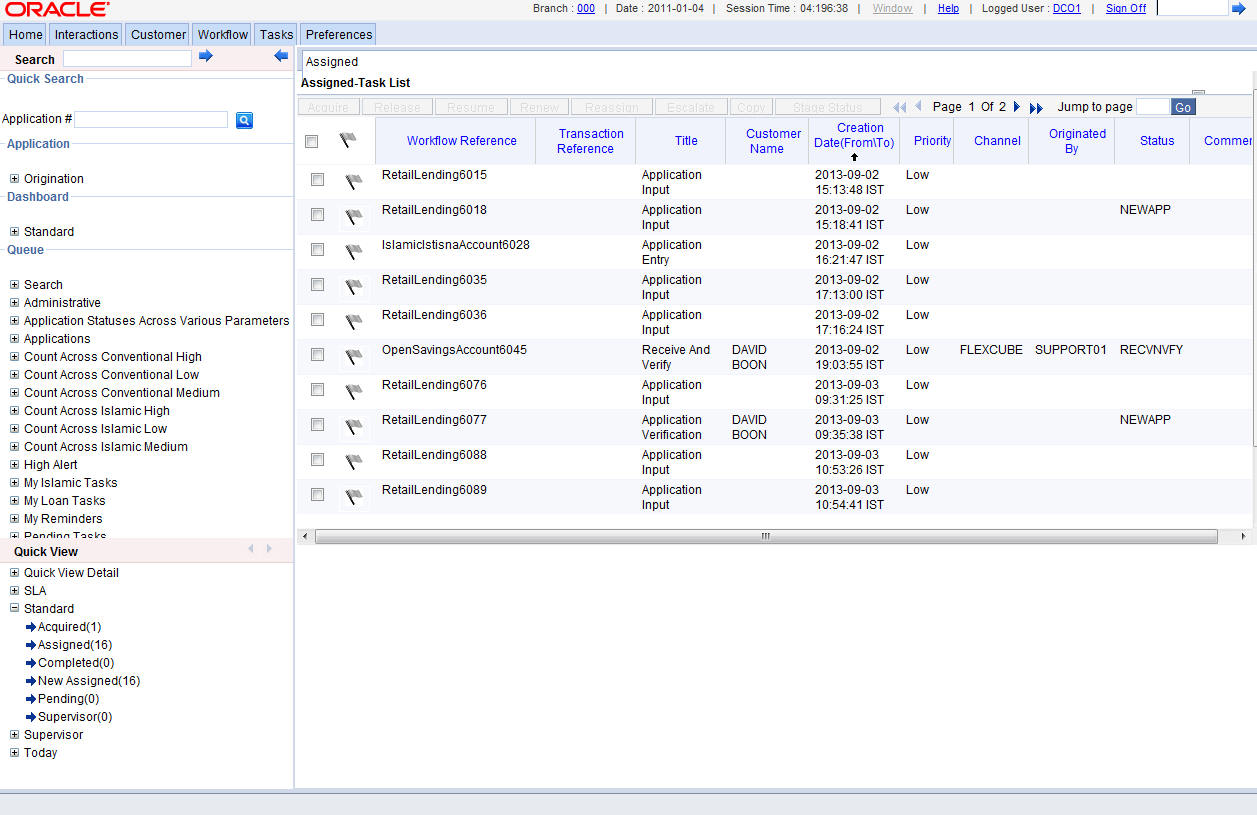
Users belonging to the user role CORMROLE (Corporate Relationship Manager) can perform this activity. Go to you ‘Assigned’ task list and acquire the task by clicking the corresponding the ‘Acquire’ button. The following screen will be displayed.
The system displays the information message as "ST-ACQR-001 Acquire Successful":
The task will then be moved to the ‘Acquired’ task list.

Go to the ‘Acquired’ task list and double click on the record to invoke the following screen.
The system displays all information captured in the “Input Details’ screen. You can verify the details and also edit them if required. If the customer has requested for credit facility, select the action ‘CREDITREQUIRED’ in the textbox adjoining the ‘Audit’ button in this screen and save the record by clicking the save icon in the tool bar. The system displays the information message as "ST-ACQR-001 Acquire Successful"
The system will create a task ‘Capture Details For IPCA Checks’ in the ‘Assigned’ task list.
2.2.3 Capture Details For IPCA Checks
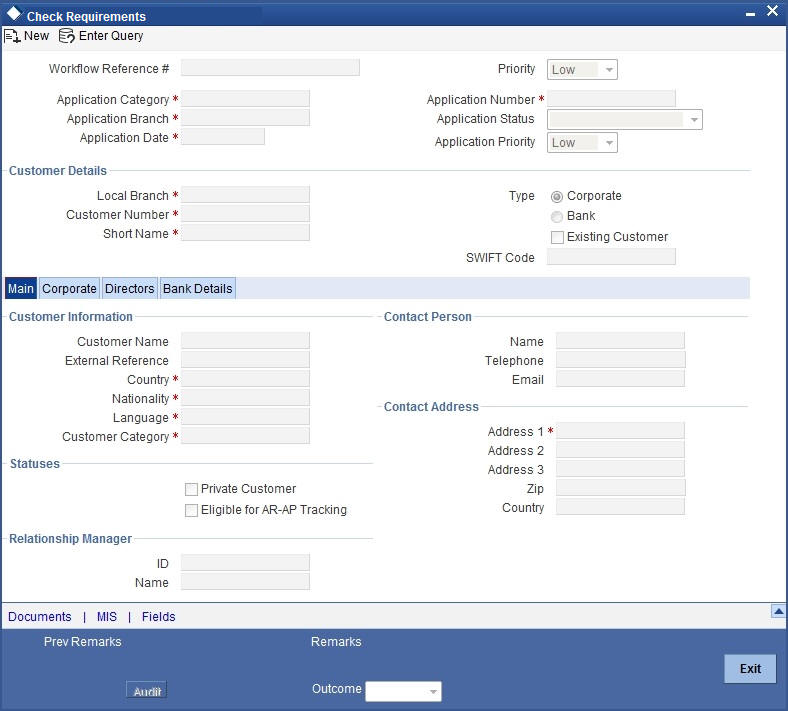
Users belonging to the user role CAEROLE (Credit Appraisal Executive) can perform this activity. Go to your ‘Assigned’ task list and acquire the task by clicking the corresponding the ‘Acquire’ button. The system displays the information message as "ST-ACQR-001 Acquire Successful"
The task will then be moved to the ‘Acquired’ task list.
Go to the ‘Acquired’ task list and double click on the record to invoke the following screen.
The system displays all information captured in the ‘Check Requirements’ screen. You can verify the details and also edit them, if required. If all information is accurate and In Principal Credit Approval (IPCA) can be granted, select the action ‘PROCEED’ in the text box adjoining the ‘Audit’ button in this screen and save the record by clicking the save icon in the tool bar. The system displays the information message as "ST-ACQR-001 Acquire Successful"
The system will create a task ‘Capture Details For NCDD Checks’ in the ‘Assigned’ task list
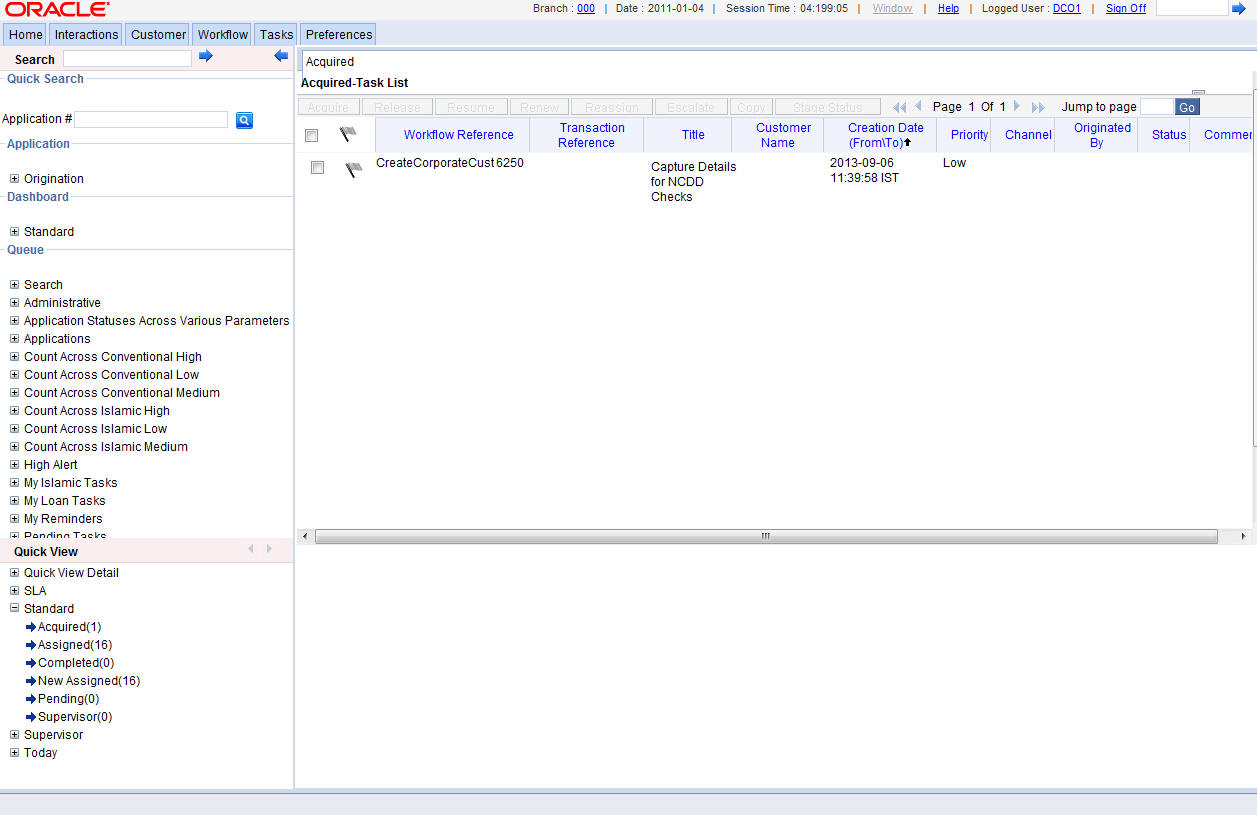
2.2.4 Capture Details for NCDD Checks
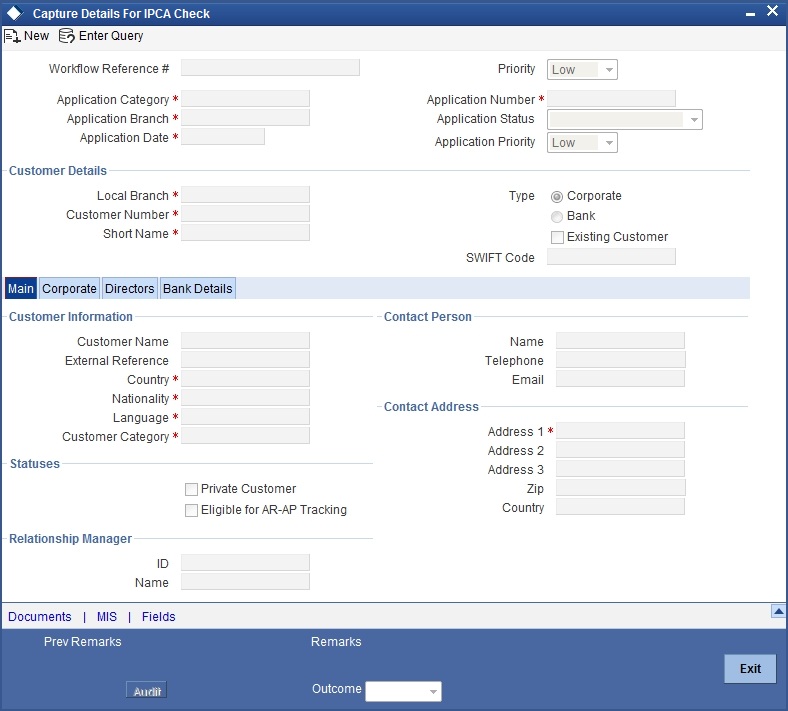
Users belonging to the user role CORMROLE (Corporate Relationship Manager) can perform this activity. Go to you ‘Assigned’ task list and acquire the task by clicking the corresponding the ‘Acquire’ button. The system displays the information message as "ST-ACQR-001 Acquire Successful"
The task will be moved to the ‘Acquired’ task list.

Go to the ‘Acquired’ task list and double click on the record to invoke the following screen.
The screen appears as shown below:
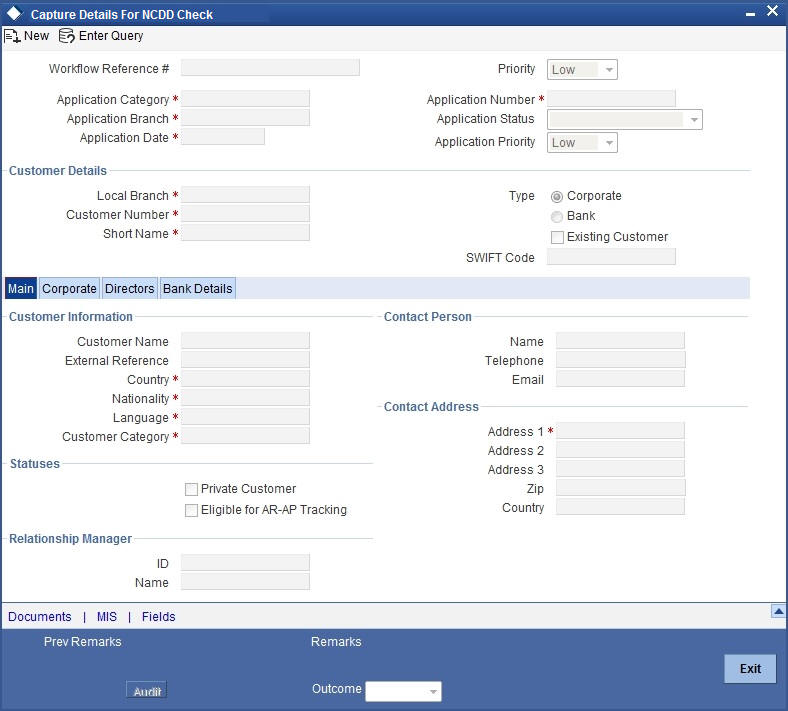
Here you can perform due diligence for the new customer. If all details and records are found acceptable, select the action ‘PROCEED’ in the textbox adjoining the 'Audit' button in this screen and save the record by clicking the save icon in the tool bar. The system displays the information message as "ST-ACQR-001 Acquire Successful"
The system will create a task ‘Check Prospect for Credit History’ in the ‘Assigned’ task list.
The screen appears as shown below:

2.2.4.1 Sub Process – Know your Customer Check
This sub process includes SDN check, contract detail verification and identity check of the customer. The account is opened when the customer passes all the checks. If any of the checks are not cleared then the account opening process is terminated.
2.2.4.2 Sub Process – In Principle Credit Checks
This process involves assessing the prospect on basis of character, capacity, capital, industry and business risks. If the prospect is found to be credit-worthy, you can take a decision to grant in-principle approval for credit facilities.
For more information on KYC, refer to the ‘Current Account Creation’ user manual.
2.2.5 Check Prospect for Credit History
Users belonging to the user role CAEROLE (Credit Appraisal Executive) can perform this activity. Go to you ‘Assigned’ task list and acquire the task by clicking the corresponding ‘Acquire’ button. The system displays the information message as "ST-ACQR-001 Acquire Successful"
The task will be moved to the ‘Acquired’ task list.

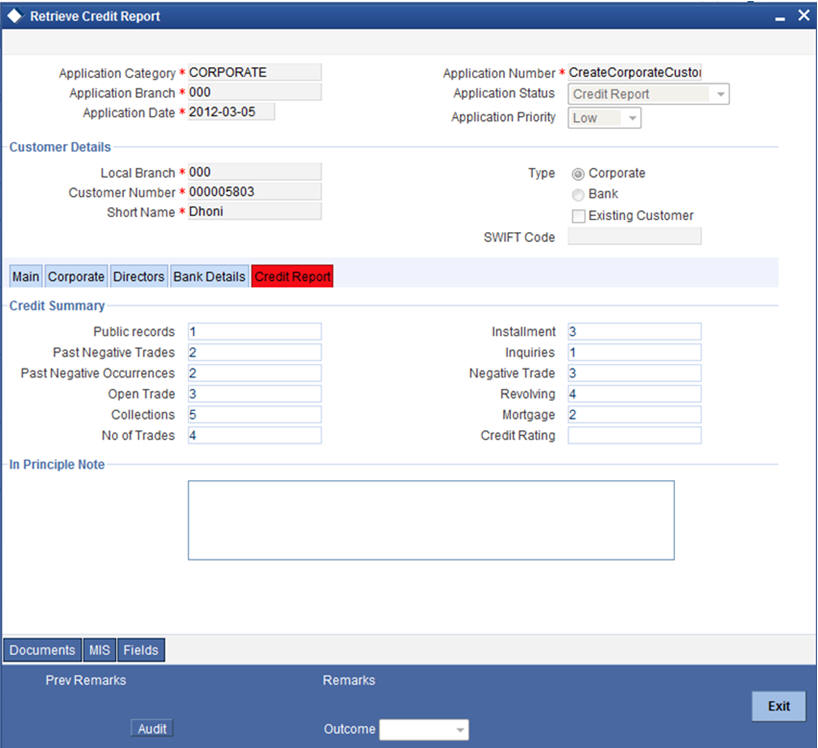
Go to the ‘Acquired’ task list and double click on the record to invoke the following screen.
The screen appears as shown below:

Here all details captured in the ‘Capture Details for NCDD Check’ are displayed. You can check for credit history of the customer and also edit the defaulted details. If all details and records are found acceptable, select the action ‘AVAILABLE’ in the textbox adjoining the 'Audit' button in this screen and save the record by clicking the save icon in the tool bar. If details are not available, select the action ‘UNAVAILABLE’ in the textbox adjoining the 'Audit' button in this screen and save the record by clicking the save icon in the tool bar. The system will move the task back to the ‘Assigned’ task list for want of those details.
If you select ‘AVAILABLE’ and save the transaction, the system displays the information message as "ST-ACQR-001 Acquire Successful"
The ‘Analyze Prospects Credit Report’ task will be created in the ‘Assigned’ task list
2.2.6 Retrieve Prospects Credit Report and Analyse
Users belonging to the user role CAEROLE can perform this activity. On acquiring it, the task will move to the ‘Acquired’ list. Fetch the record from the ‘Acquired’ list. The following screen will be displayed.
Click the ‘Documents’ button to upload documents. Select the action ‘PROCEED’ in the textbox adjoining the 'Audit' button in this screen and save the record by clicking the save icon in the tool bar.
2.2.7 Balance Sheet Analysis
Users belonging to the user role CAEROLE (Credit Appraisal Executive) can perform this activity. On acquiring it, the task will be moved to the ‘Acquired’ task list. Go to the acquired list and fetch the record.
The screen appears as shown below:
The Balance sheet of the customer which will be uploaded into DMS and attached with the transaction will be displayed here. If all details and records are found acceptable, select the action ‘PROCEED’ in the textbox adjoining the 'Audit' button in this screen and save the record by clicking the save icon in the tool bar.
The ‘Prepare Note for InPrinciple Approval’ task will be created in the ‘Assigned’ task list
2.2.8 Prepare Note for InPrinciple Approval
Users belonging to the user role CAEROLE (Credit Appraisal Executive) can perform this activity. On acquiring it, the task will be moved to the ‘Acquired’ task list. Go to the acquired list and fetch the record.
The screen appears as shown below:
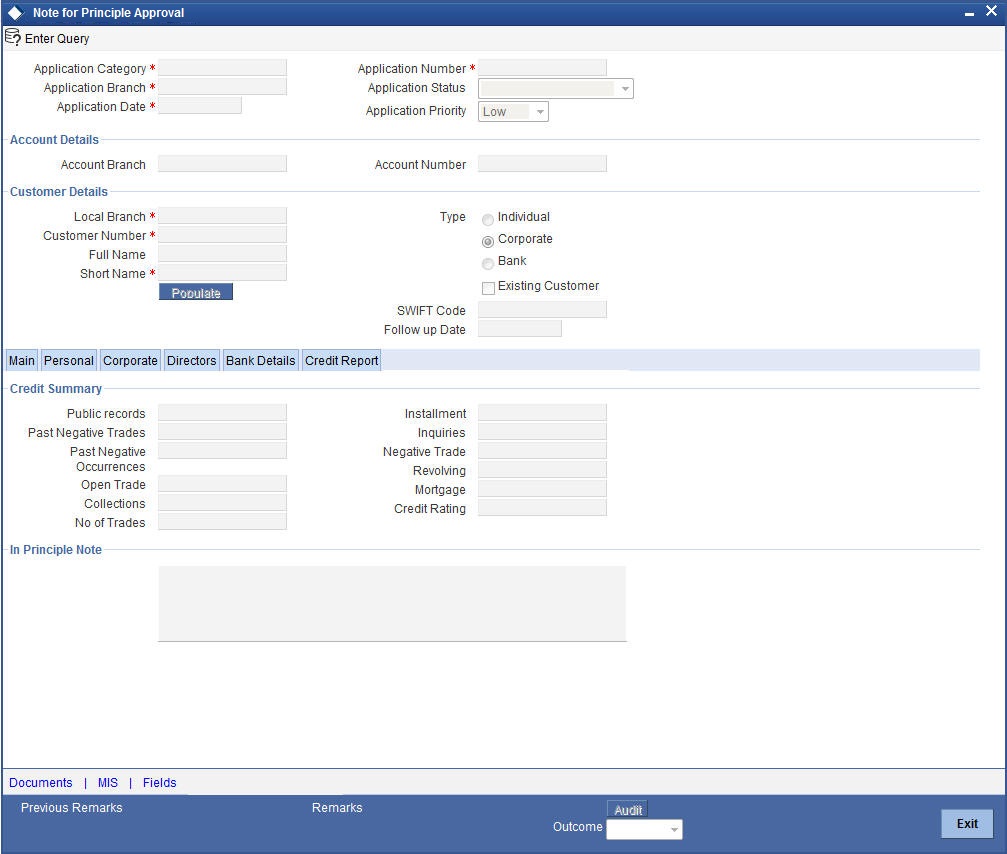
You can enter the following information:
In-Principle Note
Specify the approval note for the customer
Select the action ‘PROCEED’ in the textbox adjoining the 'Audit' button in this screen and save the record by clicking the save icon in the tool bar.
The ‘IPCA Decision’ task will be created in the ‘Assigned’ task list
2.2.9 IPCA Decision
Users belonging to the user role CAMROLE (Credit Appraisal Manager) can perform this activity. On acquiring it, the task will be moved to the ‘Acquired’ task list. Go to the acquired list and fetch the record.
The screen appears as shown below:
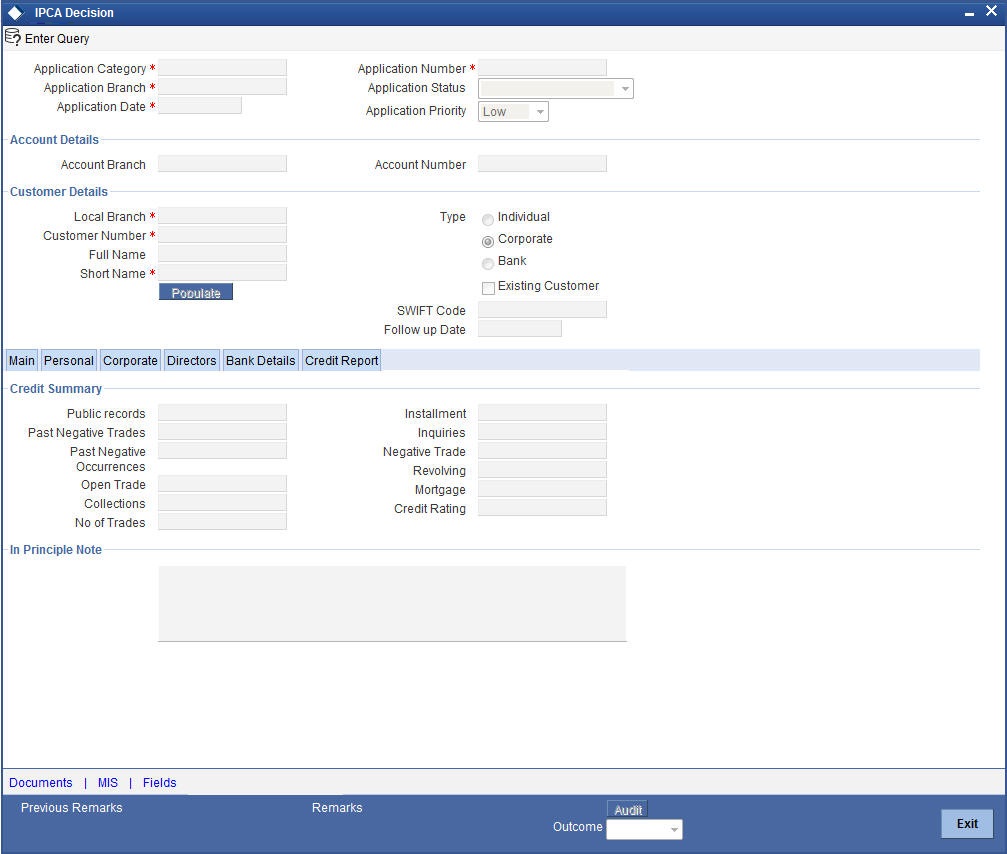
Select the action ‘PROCEED’ in the textbox adjoining the 'Audit' button in this screen and save the record by clicking the save icon in the tool bar.
If IPCA and NCDD checks have been successfully passed, the ‘Prospect Fit to Be a Customer’ task will be created in the ‘Assigned’ task list
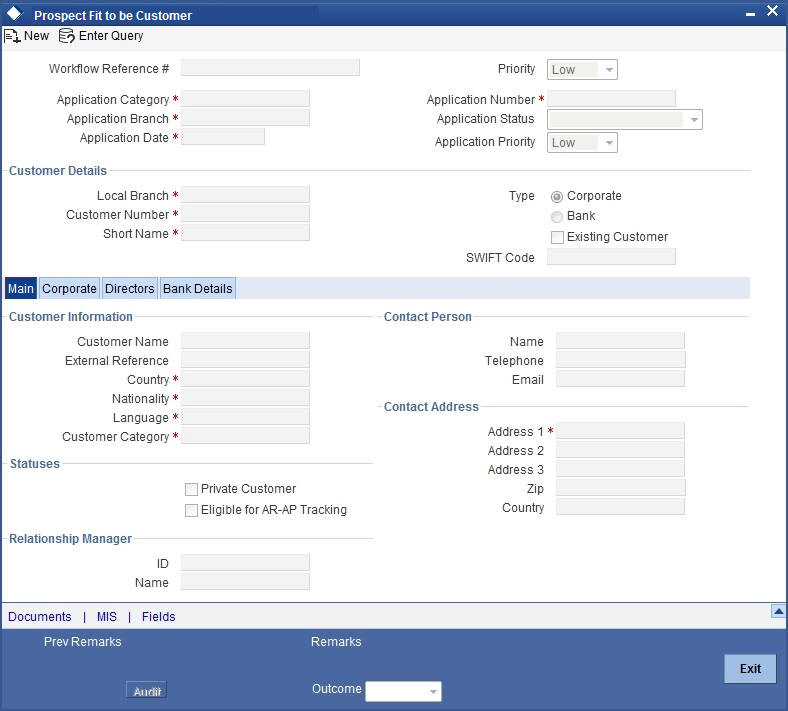
2.2.10 Prospect Fit to Be a Customer
Users belonging to the user role CORMROLE (Corporate Relationship Manager) can perform this activity. On acquiring it, the task will be moved to the ‘Acquired’ task list. Go to the acquired list and fetch the record. If the prospect is eligible for becoming a customer, select the action ‘PROCEED’ in the textbox adjoining the 'Audit' button in this screen and save the record by clicking the save icon in the tool bar. The task ‘Receive Customer Response’ will created in the ‘Assigned task list’. On acquiring it, the task will move to the ‘Acquired’ list. If the customer has accepted the offer letter, select the action ‘OFFERACCEPTED’ in the textbox adjoining the 'Audit' button in this screen and save the record by clicking the save icon in the tool bar. If the offer is not accepted, you can re-negotiate on the features of the products/facilities mentioned in the offer letter. Select the action ‘OFFERNOTACCEPTED’ in the textbox adjoining the 'Audit' button in this screen and save the record by clicking the save icon in the tool bar.
The system will create a task ‘Negotiate’ IN THE ‘Assigned’ task list.
2.2.11 Negotiation
Users belonging to the user role CORMROLE (Corporate Relationship Manager) can perform this activity. On acquiring it, the task will move to the ‘Acquired’ list. Fetch the record from the ‘Acquired’ list.
The following screen will be displayed.
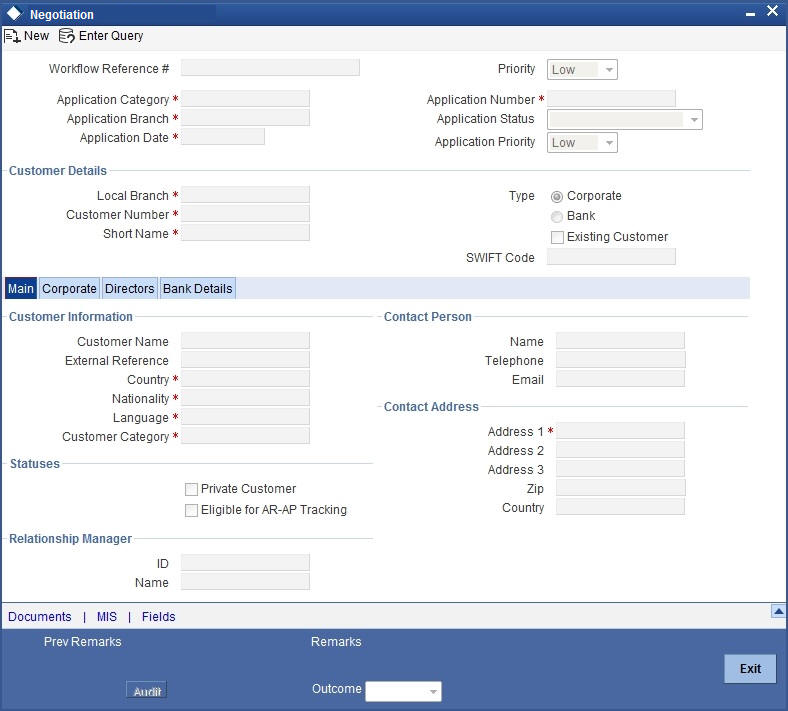
If the customer agrees on the negotiated terms and conditions, select the action ‘AGREES’ in the textbox adjoining the 'Audit' button in this screen and save the record by clicking the save icon in the tool bar. If her/she postpones the decision to a later date, capture date for the next decision making day in the ‘Follow-up Date’ field. Then select the action ‘POSTPONEDECISION’ in the textbox adjoining the 'Audit' button in this screen and save the record by clicking the save icon in the tool bar. If he/she rejects the offer, select the action ‘REJECT’ in the textbox adjoining the 'Audit' button in this screen and save the record by clicking the save icon in the tool bar.
In case of customer accepting the offer, the system will create a task ‘Obtain Customer relationship Form’ IN THE ‘Assigned’ task list.
2.2.12 Obtain Customer Relationship Form
Users belonging to the user role CORMROLE (Corporate Relationship Manager) can perform this activity. On acquiring it, the task will move to the ‘Acquired’ list. Fetch the record from the ‘Acquired’ list. The following screen will be displayed.
The screen appears as shown below
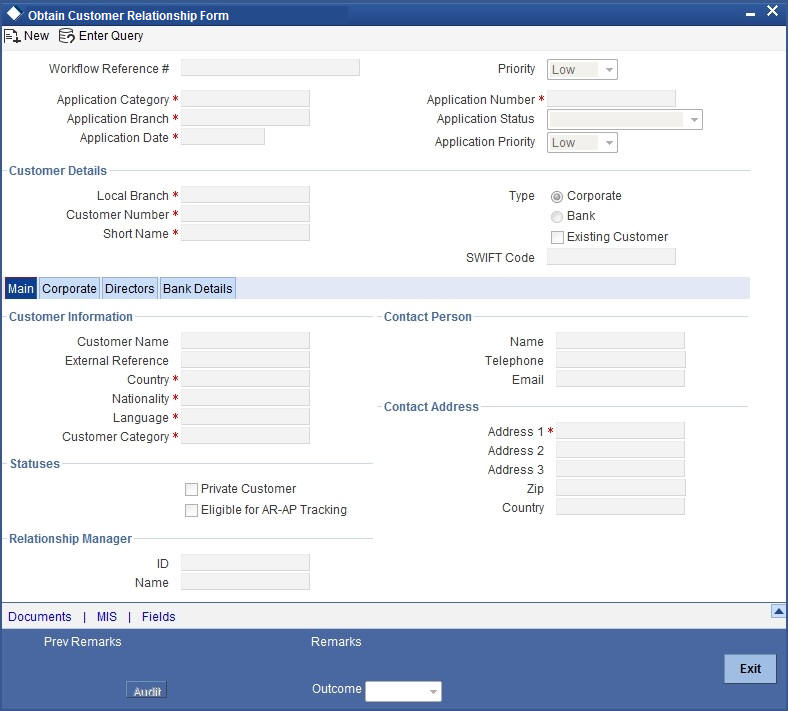
Click the ‘Documents’ button to upload documents. Select the action ‘PROCEED’ in the textbox adjoining the 'Audit' button in this screen and save the record by clicking the save icon in the tool bar.
The task ‘Input Details For Customer Creation’ will be created in the ‘Assigned’ task list
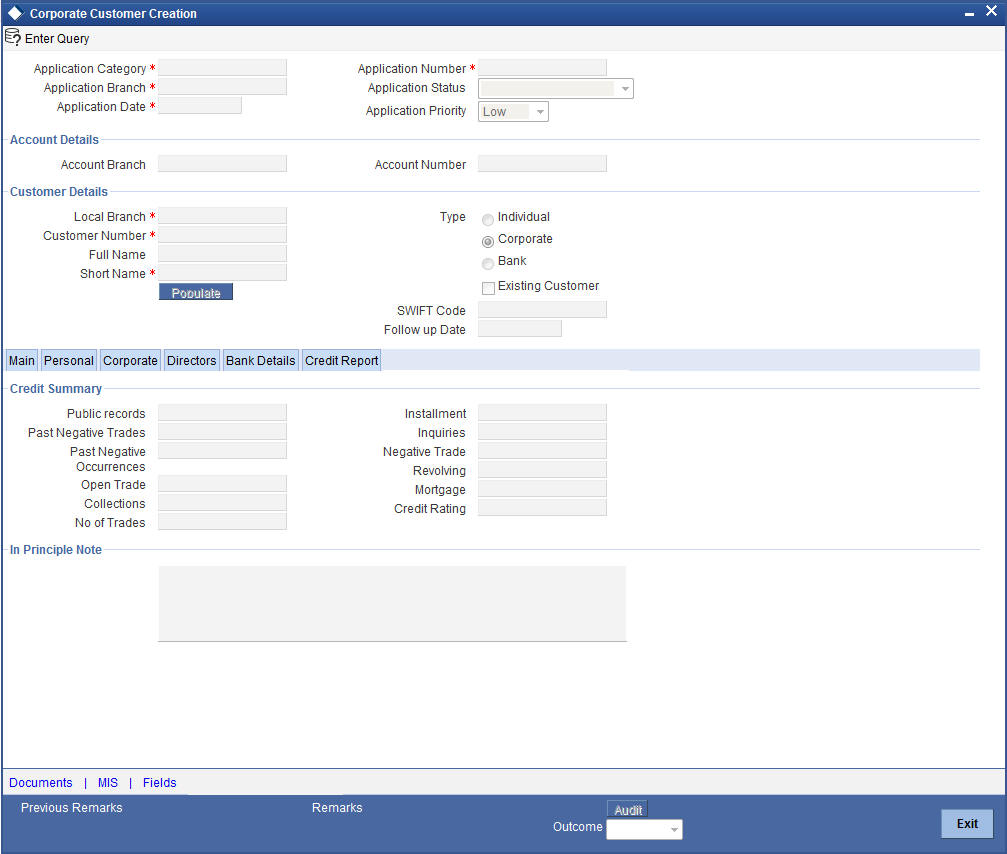
2.2.13 Input Details For Customer Creation
Users belonging to the user role COEROLE (Corporate Operations Executive) can perform this activity. On acquiring it, the task will move to the ‘Acquired’ list.
On fetching it from the ‘Acquired’ list, the following screen will be displayed.

Select the action ‘PROCEED’ in the textbox adjoining the 'Audit' button in this screen and save the record by clicking the save icon in the tool bar.
The task ‘Verify Details For Customer Creation’ will be created in the ‘Assigned’ task list.
2.2.14 Verify Details For Customer Creation
Users belonging to the user role COMROLE (Corporate Operations Manager) can perform this activity. On acquiring it, the task will move to the ‘Acquired’ list.
On fetching it from the ‘Acquired’ list, the following screen will be displayed

If everything is found acceptable, Select the action ‘PROCEED’ in the textbox adjoining the 'Audit' button in this screen and save the record by clicking the save icon in the tool bar.
The system will display the system message as “Customer has been created successfully.”
2.2.14.1 Capturing Document Details
You can capture the customer related documents in central content management repository through the ‘Documents’ screen. Click ‘Documents’ button to invoke this screen.

Here, you need to specify the following details:
Document Category
Specify the category of the document to be uploaded.
Document Reference
The system generates and displays a unique identifier for the document.
Document Type
Specify the type of document that is to be uploaded.
Upload
Click ‘Upload’ button to open the ‘Document Upload’ sub-screen. The ‘Document Upload’ sub-screen is displayed below:
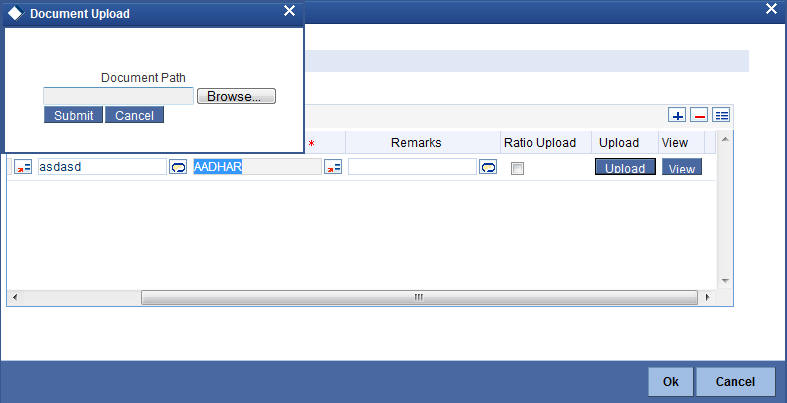
In the ‘Document Upload’ sub-screen, specify the corresponding document path and click the ‘Submit’ button. Once the document is uploaded, the system displays the document reference number.
View
Click ‘View’ to view the document uploaded.
In ‘Corporate Customer Creation’ process, ‘Document Upload’ feature is not available in all the stages. The ‘Document Upload’ feature’s availability in this process is given below:
| Stage Title | Function Id | Doc Callform Exists | Upload(Available/Not Available) | View(Available/Not Available) | |||||
|---|---|---|---|---|---|---|---|---|---|
| Input Customer Details | STDCC050 | Available | Available | Available | |||||
| Identify Customer requirements | STDCC002 | Available | Available | Available | |||||
| Capture Details For IPCA Checks | STDCC003 | Available | Available | Available | |||||
| Capture Details for NCDD Checks | STDCC004 | Available | Available | Available | |||||
| Verify prospect /customer details | STDKYC01 | Available | Not Available | Available | |||||
| Ascertain if KYC checks are required | STDKYC00 | Available | Not Available | Available | |||||
| SDN check | Subprocess | ||||||||
| Verify SDN Match | STDKYC02 | Available | Not Available | Available | |||||
| Inform Regulatory / Internal authorities on KYC checks failure | STDKYC06 | Available | Not Available | Available | |||||
| Internal blacklist check | STDKYC03 | Available | Not Available | Available | |||||
| Verify customer / prospect contact details | STDKYC05 | Available | Not Available | Available | |||||
| Other KYC Checks | STDKYC07 | Available | Not Available | Available | |||||
| KYC Decision | STDKYC08 | Available | Not Available | Available | |||||
| Check Prospect for Credit History | STDCC020 | Available | Available | Available | |||||
| Analyze Prospects Credit Report | |||||||||
| Balance Sheet Analysis | STDCC022 | Available | Available | Available | |||||
| Prepare Note for InPrinciple Approval | STDCC024 | Available | Available | Available | |||||
| IPCA Decision | |||||||||
| Prospect Fit to Be a Customer | STDCC005 | Available | Available | Available | |||||
| Negotiation | STDCC008 | Available | Available | Available | |||||
| Obtain Customer relationship Form | STDCC010 | Available | Available | Available | |||||
| Input Details For Customer Creation | STDCC011 | Available | Available | Available | |||||
| Verify Details For Customer Creation | STDCC012 | Available | Available | Available |
2.2.14.2 Capturing MIS Details
Click ‘MIS’ button to invoke the Customer MIS screen.

You can capture the customer MIS details on this screen. The system defaults the MIS details on clicking ‘Default from MIS Group’ button.
However, you can modify the MIS information before proceeding to the next stage.
2.2.14.3 Capturing UDF Details
Click on ‘Fields’ button to invoke the screen.
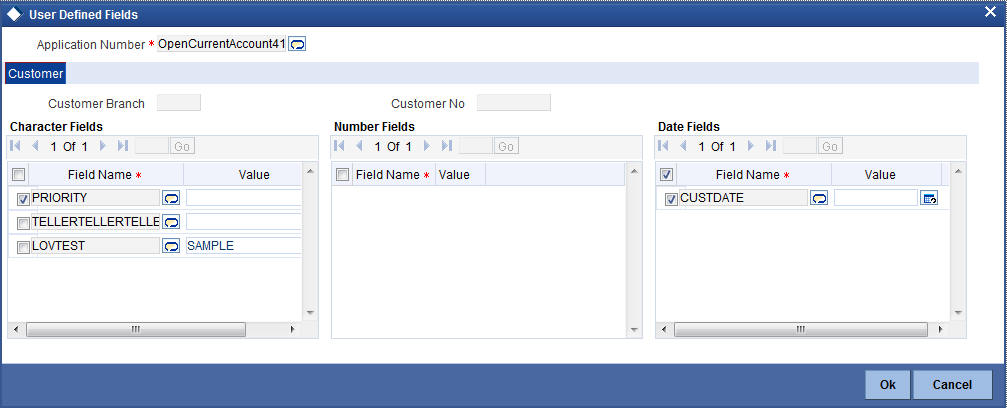
The system defaults the UDF Details in the ‘User Defined Fields’ screen.
However, you can modify the UDF information before proceeding to the next stage.